部署go代码
内置web服务,很强大,为何大家都爱用go原因在此
运维成本很低
一、简介
与 PHP 应用相比,部署 Go 应用相对简单,因为所有应用代码都被打包成一个二进制文件了(视图模板、静态资源和配置文件等非 Go 代码除外),并且不需要依赖其他库(PHP 需要安装各种扩展),不需要额外的运行时环境(比如 Java 需要再安装 JVM),也不需要部署额外的 HTTP 服务器(比如 PHP 还需要再启动 PHP-FPM 处理请求)。
对于在线论坛项目,包含了静态资源文件(CSS、JavaScript、图片),所以我们将在 Go Web 应用之前前置一个 Nginx 服务器处理静态资源请求,然后通过反向代理处理动态资源请求(指向 Go 处理器方法的请求),对于那些不包含静态资源和视图模板的纯 API 项目,通常只需要打包一份二进制文件部署到服务器即可,更加便捷。
注:其实 Go 应用部署的最佳实践是基于 Docker,后续我们在部署专题中再介绍如何基于 Docker 将应用快速部署到远程云服务器。
二、构建应用
2.1 下载go环境
wget https://go.dev/dl/go1.22.1.linux-amd64.tar.gz
tar xf go1.22.1.linux-amd64.tar.gz
mv go /usr/local/go

vim /etc/profile
PATH=/usr/local/go/bin:$PATH
export PATH
2.2 构建二进制命令
# 0. 七牛 CDN
go env -w  GOPROXY=https://goproxy.cn,direct

# 1、下载代码
https://gitee.com/egonlin/go-pro

原项目地址在这里https://github.com/nonfu/chitchat,可能会随着作者更新导致数据库表发生变动导致与本文部署细节略有不同

# 2、解压
mkdir /go_pro
unzip chitchat-master.zip -d /go_pro
cd /go_pro/chitchat-master
rm -rf  chitchat # 删除自带的,我们自己来编一个
go build -o chitchat

# 3、会得到一个二进制命令如下图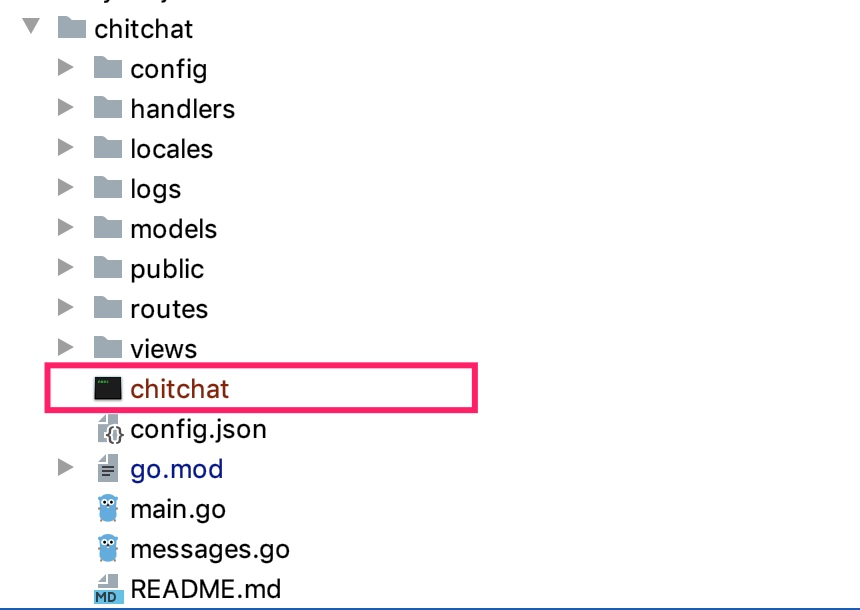
4、修改配置
[root@web02 chitchat-master]# pwd
/go_pro/chitchat-master

[root@web02 chitchat-master]# cat config.json
{
  "App": {
    "Address": "0.0.0.0:8080",
    "Static": "public",
    "Log": "logs",
    "Locale": "locales",
    "Language": "en"
  },
  "Db": {
    "Driver": "mysql",
    "Address": "localhost:3306",
    "Database": "chitchat",
    "User": "root",
    "Password": "Egon@123"
  }
}
5、登录mysql创建库创建表
create database chitchat charset utf8mb4;

use chitchat;
drop table posts;
drop table threads;
drop table sessions;
drop table users;

create table users (
  id         serial primary key,
  uuid       varchar(64) not null unique,
  name       varchar(255),
  email      varchar(255) not null unique,
  password   varchar(255) not null,
  created_at timestamp not null
);

create table sessions (
  id         serial primary key,
  uuid       varchar(64) not null unique,
  email      varchar(255),
  user_id    integer references users(id),
  created_at timestamp not null
);

create table threads (
  id         serial primary key,
  uuid       varchar(64) not null unique,
  topic      text,
  user_id    integer references users(id),
  created_at timestamp not null
);

create table posts (
  id         serial primary key,
  uuid       varchar(64) not null unique,
  body       text,
  user_id    integer references users(id),
  thread_id  integer references threads(id),
  created_at timestamp not null
);原项目在这里:https://github.com/sausheong/gwp/blob/master/Chapter_2_Go_ChitChat/chitchat/data/setup.sql
5、测试一下
添加解析
C:\Windows\System32\drivers\etc\hosts中添加如下记录:
192.168.71.238 chitchat.test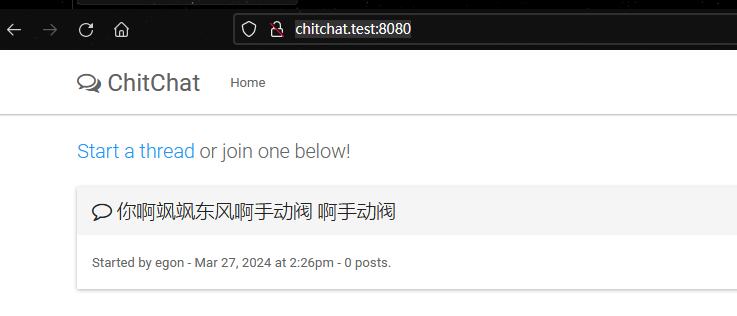
三、配置nginx转发
虽然上述方式可以正常运行,但是如果要高效处理静态资源文件并对其做缓存,可以借助 Nginx 作为反向代理服务器来完成,我们在 Nginx 虚拟主机配置目录 /etc/nginx/conf.d 中新增一个配置文件 chitchat.conf:
server {
listen 80;
server_name chitchat.test www.chitchat.test;
location /static {
root /go_pro/chitchat-master/public;
expires 1d; # 静态资源缓存一天
add_header Cache-Control public;
access_log off;
try_files $uri @goweb; # try_files指令会先查找路径/go_pro/chitchat-master/public/$uri是否存在,存在则返回,否则交给@goweb处理
}
location / {
try_files /_not_exists_ @goweb; # /_not_exists路径肯定不存在,使得所有请求都会转向名为@goweb的location块
}
location @goweb { # 定义一个名为@goweb的localtion块,用于处理动态请求
proxy_set_header Host $http_host;
proxy_set_header X-Real-IP $remote_addr;
proxy_set_header X-Forwarded-For $proxy_add_x_forwarded_for;
proxy_set_header X-Scheme $scheme;
proxy_redirect off;
proxy_pass http://127.0.0.1:8080;
}
error_log /var/log/nginx/chitchat_error.log;
access_log /var/log/nginx/chitchat_access.log;
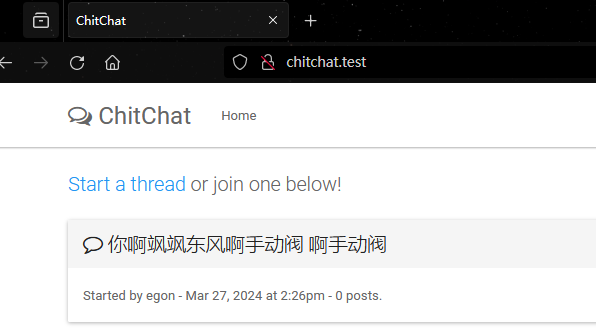
}启动nginx后,直接用80访问
四、通过 Supervisor 维护应用守护进程
看起来一切都 OK 了,但是目前这种模式下,用户退出后 Go Web 应用进程会关闭,这显然是不行的,而且如果 Go Web 应用进程因为其他异常挂掉,也无法自动重启,每次需要我们登录到服务器进行启动操作,这很不方便,也影响在线应用的稳定性,为此,我们需要借助第三方进程监控工具帮我们实现 Go Web 应用进程以后台守护进程的方式运行。常见的进程监控工具有 Supervisor、Upstart、systemd 等,
# 1、安装
yum install supervisor -y

# 2、介绍
Supervisor安装与配置(linux/unix进程管理工具) Supervisor(Supervisor: A Process Control System)
是用Python开发的一个client/server服务,是Linux/Unix系统下的一个进程管理工具,不支持Windows系统。
它可以很方便的监听、启动、停止、重启一个或多个进程。用Supervisor管理的进程,当一个进程意外被杀死,
supervisort监听到进程死后,会自动将它重新拉起,很方便的做到进程自动恢复的功能,不再需要自己写shell脚本来控制。
接下来我就借助Supervisor来管理 Go Web 应用进程。
首先创建对应的 Supervisor 配置文件 /etc/supervisord.d/chitchat.ini,这里需要设置进程启动目录及命令、进程意外挂掉后是否自动重启、以及日志文件路径等:
[program:chitchat]
process_name=%(program_name)s
directory=/go_pro/chitchat-master
command=/go_pro/chitchat-master/chitchat
autostart=true
autorestart=true
user=root
redirect_stderr=true
stdout_logfile=/go_pro/chitchat-master/logs/chitchat.log
注意:我们需要进入 chitchat 所在目录执行启动命令,否则会找不到配置文件和其他资源路径,所以需要配置 directory 选项。
然后关闭之前通过手动运行 chitchat 启动的 Go Web 服务器,再运行如下指令通过 Supervisor 启动并维护 Go Web 应用进程:
systemctl start supervisord # 需要先start一下suspervisord这个父进程
supervisorctl reread
supervisorctl update
supervisorctl start chitchat
你可以通过 ps -ef | grep chitchat 查看进程是否启动成功:
 [root@web02 supervisord.d]# ps -elf |grep chitchat
4 S root     112927 112838  0  80   0 - 333359 ep_pol 22:48 ?       00:00:00 /go_pro/chitchat-master/chitchat
0 R root     112960 106248  0  80   0 - 28203 -      22:48 pts/0    00:00:00 grep --color=auto chitchat
它是以守护进程的方式运行的,并且可以在关闭后自动重启。